
")


If you’ve ever built a YouTube thumbnail, a promo graphic, or even a social post and thought, “Ugh, I need a completely different photo for this,” this is going to save you a ridiculous amount of time.
The whole idea is simple. You take one photo of yourself, preferably something fairly neutral, and use Canva’s AI Face Expression app to generate different moods from that single image. That means no retaking photos, no changing outfits, and no scrambling to recreate the same lighting setup later.
For thumbnail design especially, this is incredibly handy. You can create multiple image variations quickly, test different looks, and match the expression to the message on the graphic without needing a whole new shoot every time.
Table of Contents
- Step 1: Understand why this tool is so useful for thumbnails and social graphics
- Step 2: Find the AI Face Expression app inside Canva
- Step 3: Start with the right kind of photo
- Step 4: Choose the expression you want to generate
- Step 5: Generate the new face and understand how credits work
- Step 6: Add the generated image back into your Canva design
- Step 7: Remove the background if you want a cleaner thumbnail cutout
- Step 8: Build multiple thumbnail variations faster
- Step 9: Buy more credits if you plan to use it regularly
- Step 10: Apply the discount code before you check out
- Step 11: Use the tool strategically, not just for novelty
- Step 12: Keep your workflow simple
Step 1: Understand why this tool is so useful for thumbnails and social graphics
Facial expression matters more than most people realize.
When you are designing thumbnails, the image is often doing a lot of the heavy lifting. The right expression can make a design feel more curious, dramatic, skeptical, excited, or surprising. That emotional cue helps the whole graphic communicate faster.
If you create multiple thumbnail options for one piece of content, this gets even more valuable. Different expressions can completely change how the design feels, even when the text and layout stay nearly the same.
That is exactly why this workflow works so well. Instead of trying to photograph every possible emotion in advance, you can start with one solid image and adapt it later.
- Use it for YouTube thumbnails when you want stronger visual hooks.
- Use it for social media posts when you want more variety from one brand shoot.
- Use it for testing when you need several creative directions quickly.
Step 2: Find the AI Face Expression app inside Canva
Canva has a huge apps panel built in, and it is easy to overlook just how much is tucked away in there.
Inside Canva, go to the Apps section and search for AI Face Expression or simply face expression. You are looking for the app specifically called AI Face Expression.
This app lets you upload a photo and swap the facial expression in a single click. It is one of those tools that feels oddly niche until you use it once, and then suddenly you start seeing a dozen ways it fits into your workflow.
Canva’s app library also includes plenty of other extras, like QR generators, background tools, blending effects, and specialty design helpers. But for this workflow, you only need the expression app.
Step 3: Start with the right kind of photo
This part matters more than you might think.
The best starting image is usually a plain, fairly neutral photo of yourself. A casual smile can work, but you generally want to avoid starting with something too extreme, because the app needs enough room to shift your face naturally into other emotions.
You have two ways to bring in your image:
- Upload your image into Canva first, then drag it into your design
- Upload it directly through the app using the file picker
A helpful detail from the app developer is that uploaded images are handled securely and are not being sent elsewhere for unrelated use. If privacy is something you are cautious about, that reassurance is nice to have.
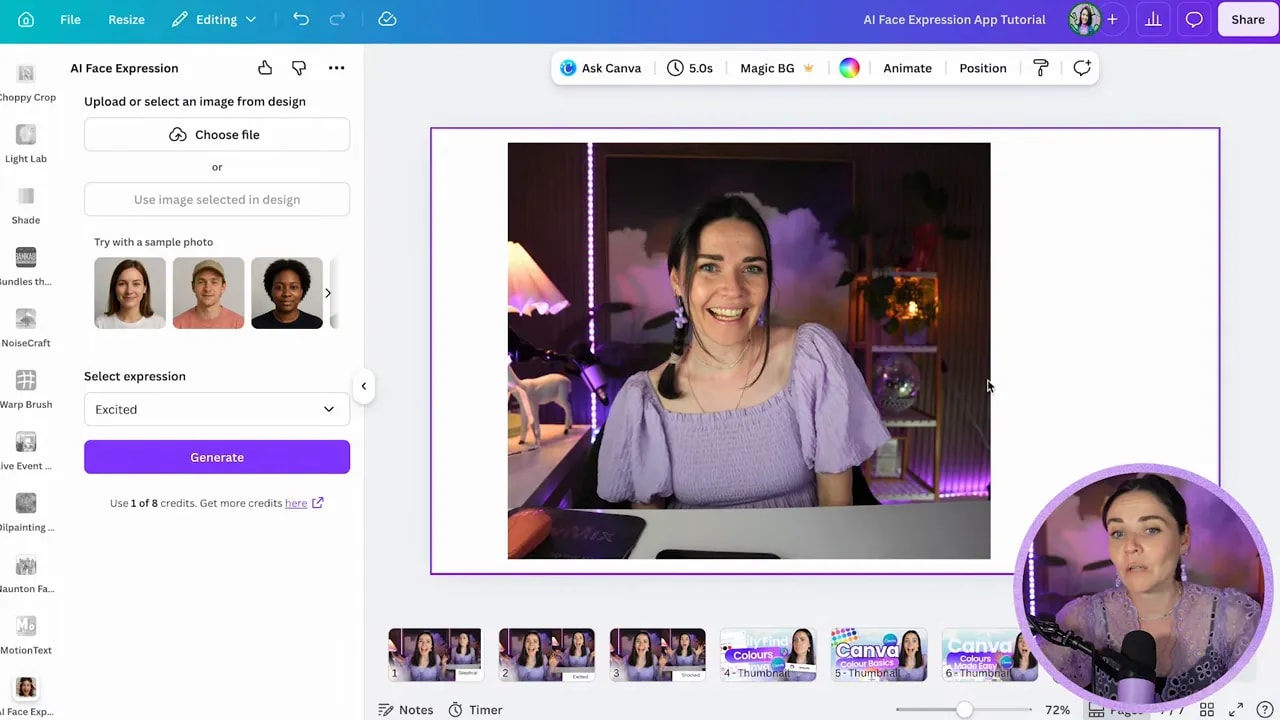
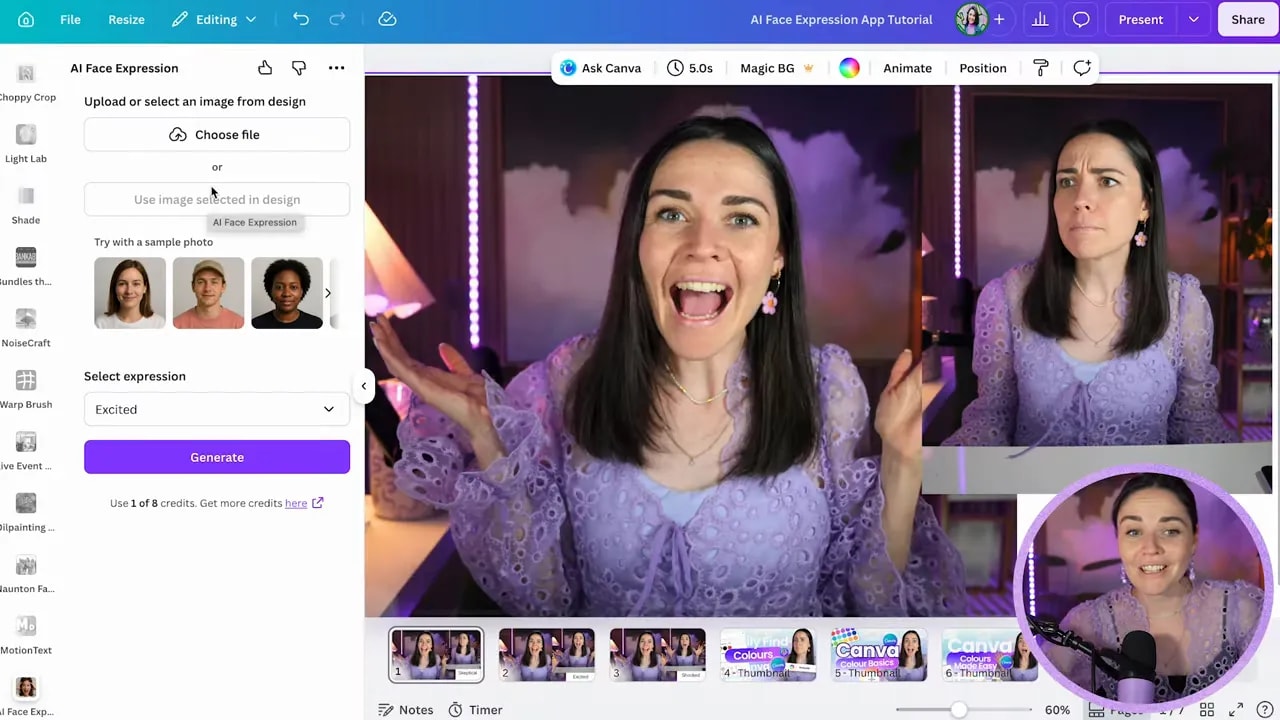
Step 4: Choose the expression you want to generate
Once your image is selected, pick an expression from the built-in list.
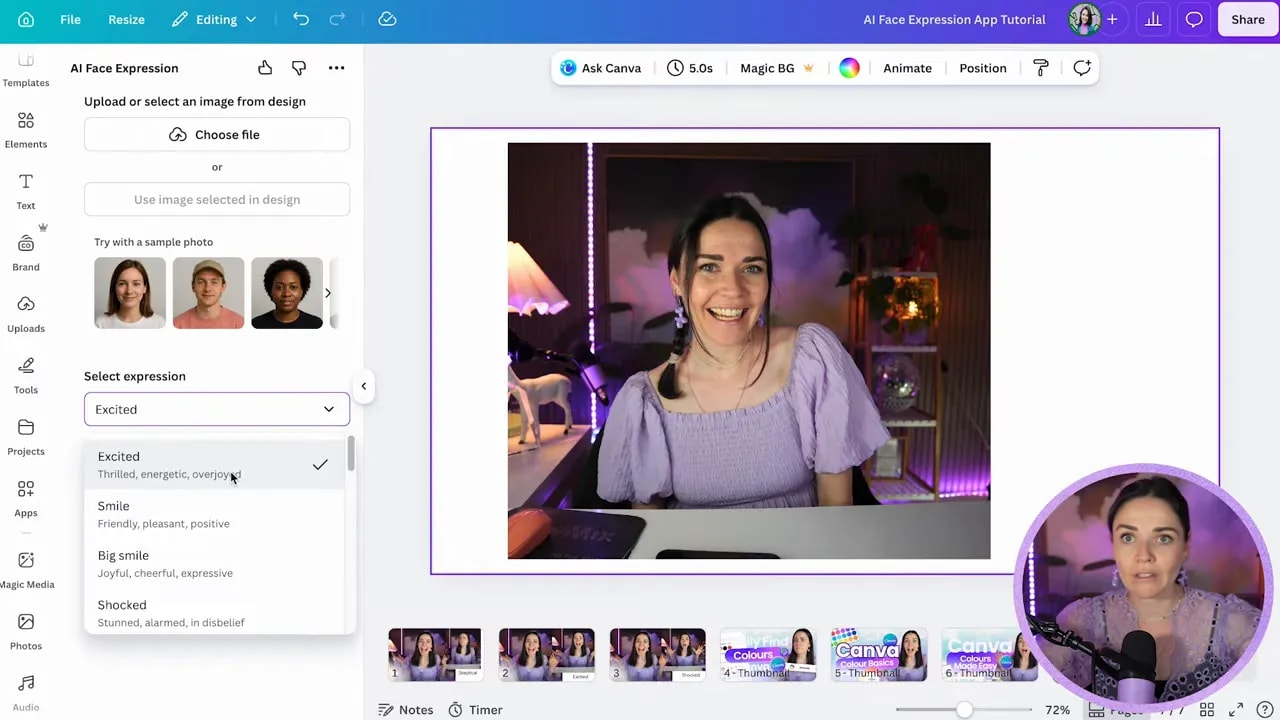
You are not typing a custom prompt here. Instead, the app gives you a menu of preset emotions and facial styles. The available options include things like:
- Excited
- Smile
- Big smile
- Shocked
- Confident
- Sad
- Angry
- Surprised
- Serious
- Nervous
- Worried
- Embarrassed
- Disgusted
- Calm
- Thinking
- Curious
- Skeptical
- Poker face
- Flirty
- Neutral
That might sound limiting compared to freeform AI prompting, but honestly, it is enough. For thumbnail and social content work, these cover most of the emotional beats you are likely to need.
One easy mistake to avoid: make sure you have actually selected the image before hitting generate. If Canva tells you to upload or select an image, just click your photo in the design first, then choose Use selected image.
Step 5: Generate the new face and understand how credits work
After you choose an expression, click Generate.
The app creates one result per generation, and each result uses one credit. You usually get one free credit to start with, which is enough to test the tool, but if you want to use it regularly, you will need to buy more.
That credit system is worth knowing upfront because this is not the kind of tool where you want to burn through credits on random sample images. Use your own photo and generate intentionally.
The time savings can be well worth it, especially if you create a lot of graphics and are tired of reshooting yourself every time your content angle changes slightly.
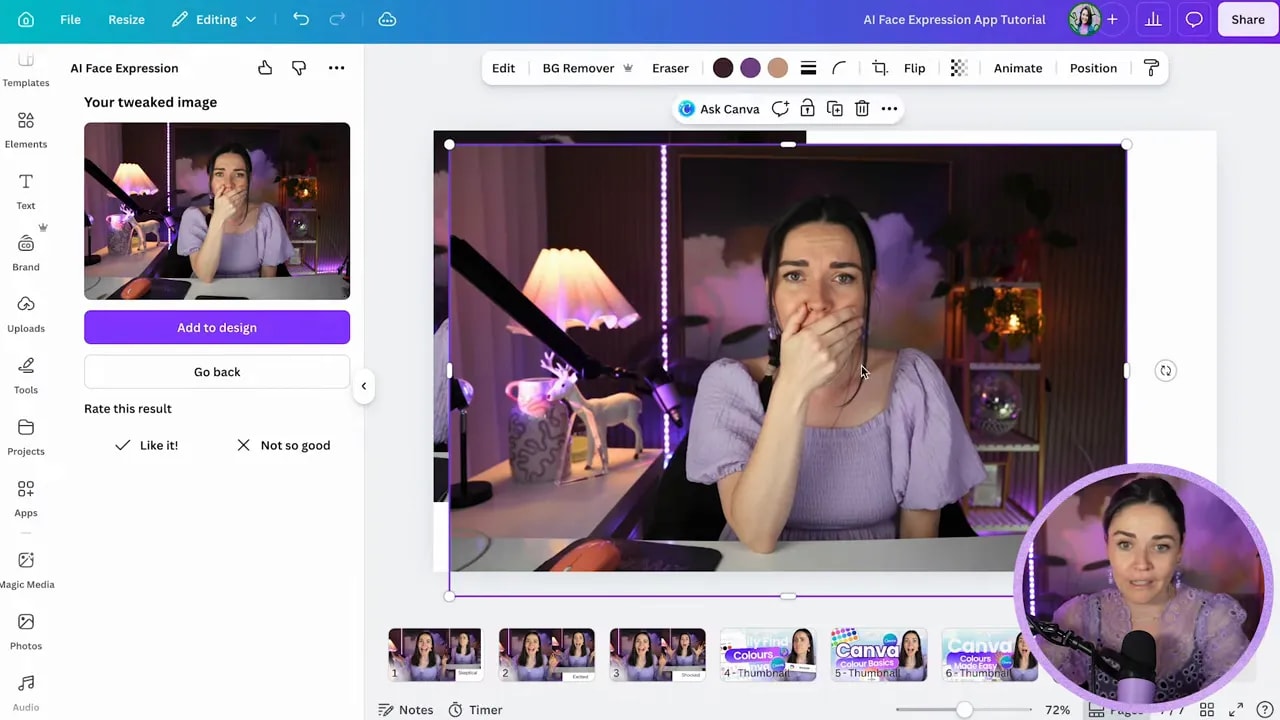
Step 6: Add the generated image back into your Canva design
Once the result is ready, click Add to design.
The image gets added into your Canva uploads and dropped into your workspace so you can use it immediately. From there, you can resize it, reposition it, and swap it into your thumbnail design like any other uploaded photo.
One of the fun details is that the tool sometimes adds hands into the frame, even when they were not visible in the original crop. Surprisingly, that can work really well. It can make the result feel more dynamic and give your image a bit more depth.
FREE Design Tools to $100k Masterclass
Grow your biz with clever design and Canva hacks that will save you hours and make you sales.
Some results will be stronger than others, of course, but for fast creative iteration, it is impressively useful.
Step 7: Remove the background if you want a cleaner thumbnail cutout
If you are using Canva Pro, the next move is usually to apply Background Remover.
That gives you a clean cutout version of the generated image, which is ideal for thumbnails, layered social graphics, or any design where you want yourself separated from the original room or photo backdrop.

If you do not have Canva Pro, you can still use alternate background removal apps inside Canva. The main goal is simply to isolate the subject so the expression can sit neatly inside your design.
This is where the whole workflow comes together. One photo becomes a new expression, then a cutout, then a design element you can drop straight into your final thumbnail.
Step 8: Build multiple thumbnail variations faster
This is where the tool really shines.
If you make multiple thumbnail options for the same video or campaign, changing the expression gives you fresh creative directions without rebuilding everything from scratch.
You might take the same base image and create:
- A skeptical version for a myth-busting topic
- A shocked version for a surprising result or warning
- An embarrassed or worried version for a mistake-based topic
- An excited version for a tutorial, win, or announcement
That flexibility is especially useful when you are in the middle of editing and realize the text on the graphic would work better with a completely different emotional tone.
Instead of stopping everything to reshoot, you can just generate a new expression that matches the concept.
Step 9: Buy more credits if you plan to use it regularly
When you need more credits, click Get more credits inside the app. That sends you to the developer’s external site, where you can choose a package.
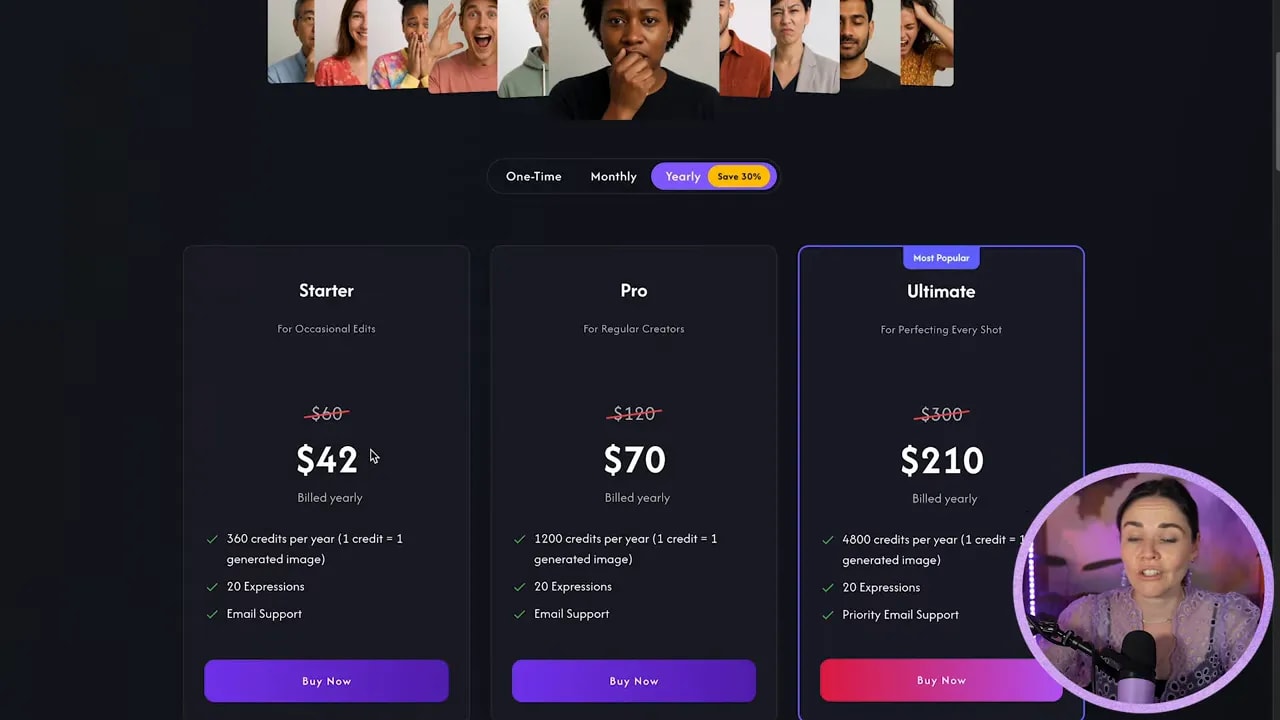
At the time this tutorial was recorded, there were several pricing options, including one-time bundles and subscription plans.
Examples included:
- A starter one-time pack for $5 with 15 credits
- A monthly plan for $5 with 30 credits
- A yearly plan for $42 with 360 credits
If you only need this occasionally, a small one-time pack may be plenty.
If you create content often and want lots of thumbnail variations, a monthly or yearly option can make more sense. The best plan really depends on how often you need alternate expressions.
Step 10: Apply the discount code before you check out
If you do buy credits, there is a discount code you can use for 10% off.
Enter jacqui at checkout and validate it before paying.
If you want to explore the free Canva masterclass that was mentioned alongside this tutorial, you can grab it here: Design Tools to $100k.
Step 11: Use the tool strategically, not just for novelty
The real value here is not that it is a clever AI trick. The value is that it speeds up your design workflow and helps you make more strategic graphics.
A stronger thumbnail is not just louder or weirder. It is clearer. The expression should support the message you are trying to communicate.
So when you use this tool, think about:
- What emotion best matches the headline?
- What expression would stand out most at a small size?
- Do you need several options to test different angles?
- Would a neutral, skeptical, shocked, or excited face tell the story fastest?
That is where this becomes genuinely practical for content creation, branding graphics, and fast thumbnail design in Canva.
Step 12: Keep your workflow simple
If you want the easiest version of this process, here is the basic system:
- Take one clean, neutral photo of yourself.
- Open Canva and search for AI Face Expression in Apps.
- Select your image and choose an expression.
- Generate the new variation.
- Add it to your design.
- Remove the background if needed.
- Drop it into your thumbnail or social graphic.
- Repeat for extra concepts only when they actually serve the design.
That is it. One image in, multiple usable versions out.
And if you are someone who is always creating content and always wishing you had “just one more expression” to work with, this little Canva app can be a massive shortcut.


